> ## Documentation Index
> Fetch the complete documentation index at: https://help.emotive.io/llms.txt
> Use this file to discover all available pages before exploring further.
# Set Up Emotive CartAI
> Recover more revenue with Emotive's CartAI feature.
This article will walk you through the steps needed to set up Emotive CartAI. In order to get started, you'll need to ensure that you have access to the following:
* Shopify Admin Access to Install Applications
* Shopify Access to **Settings > Customer Event**
* Access to your DNS (Domain) Records
## Install the Shopify App
To get started:
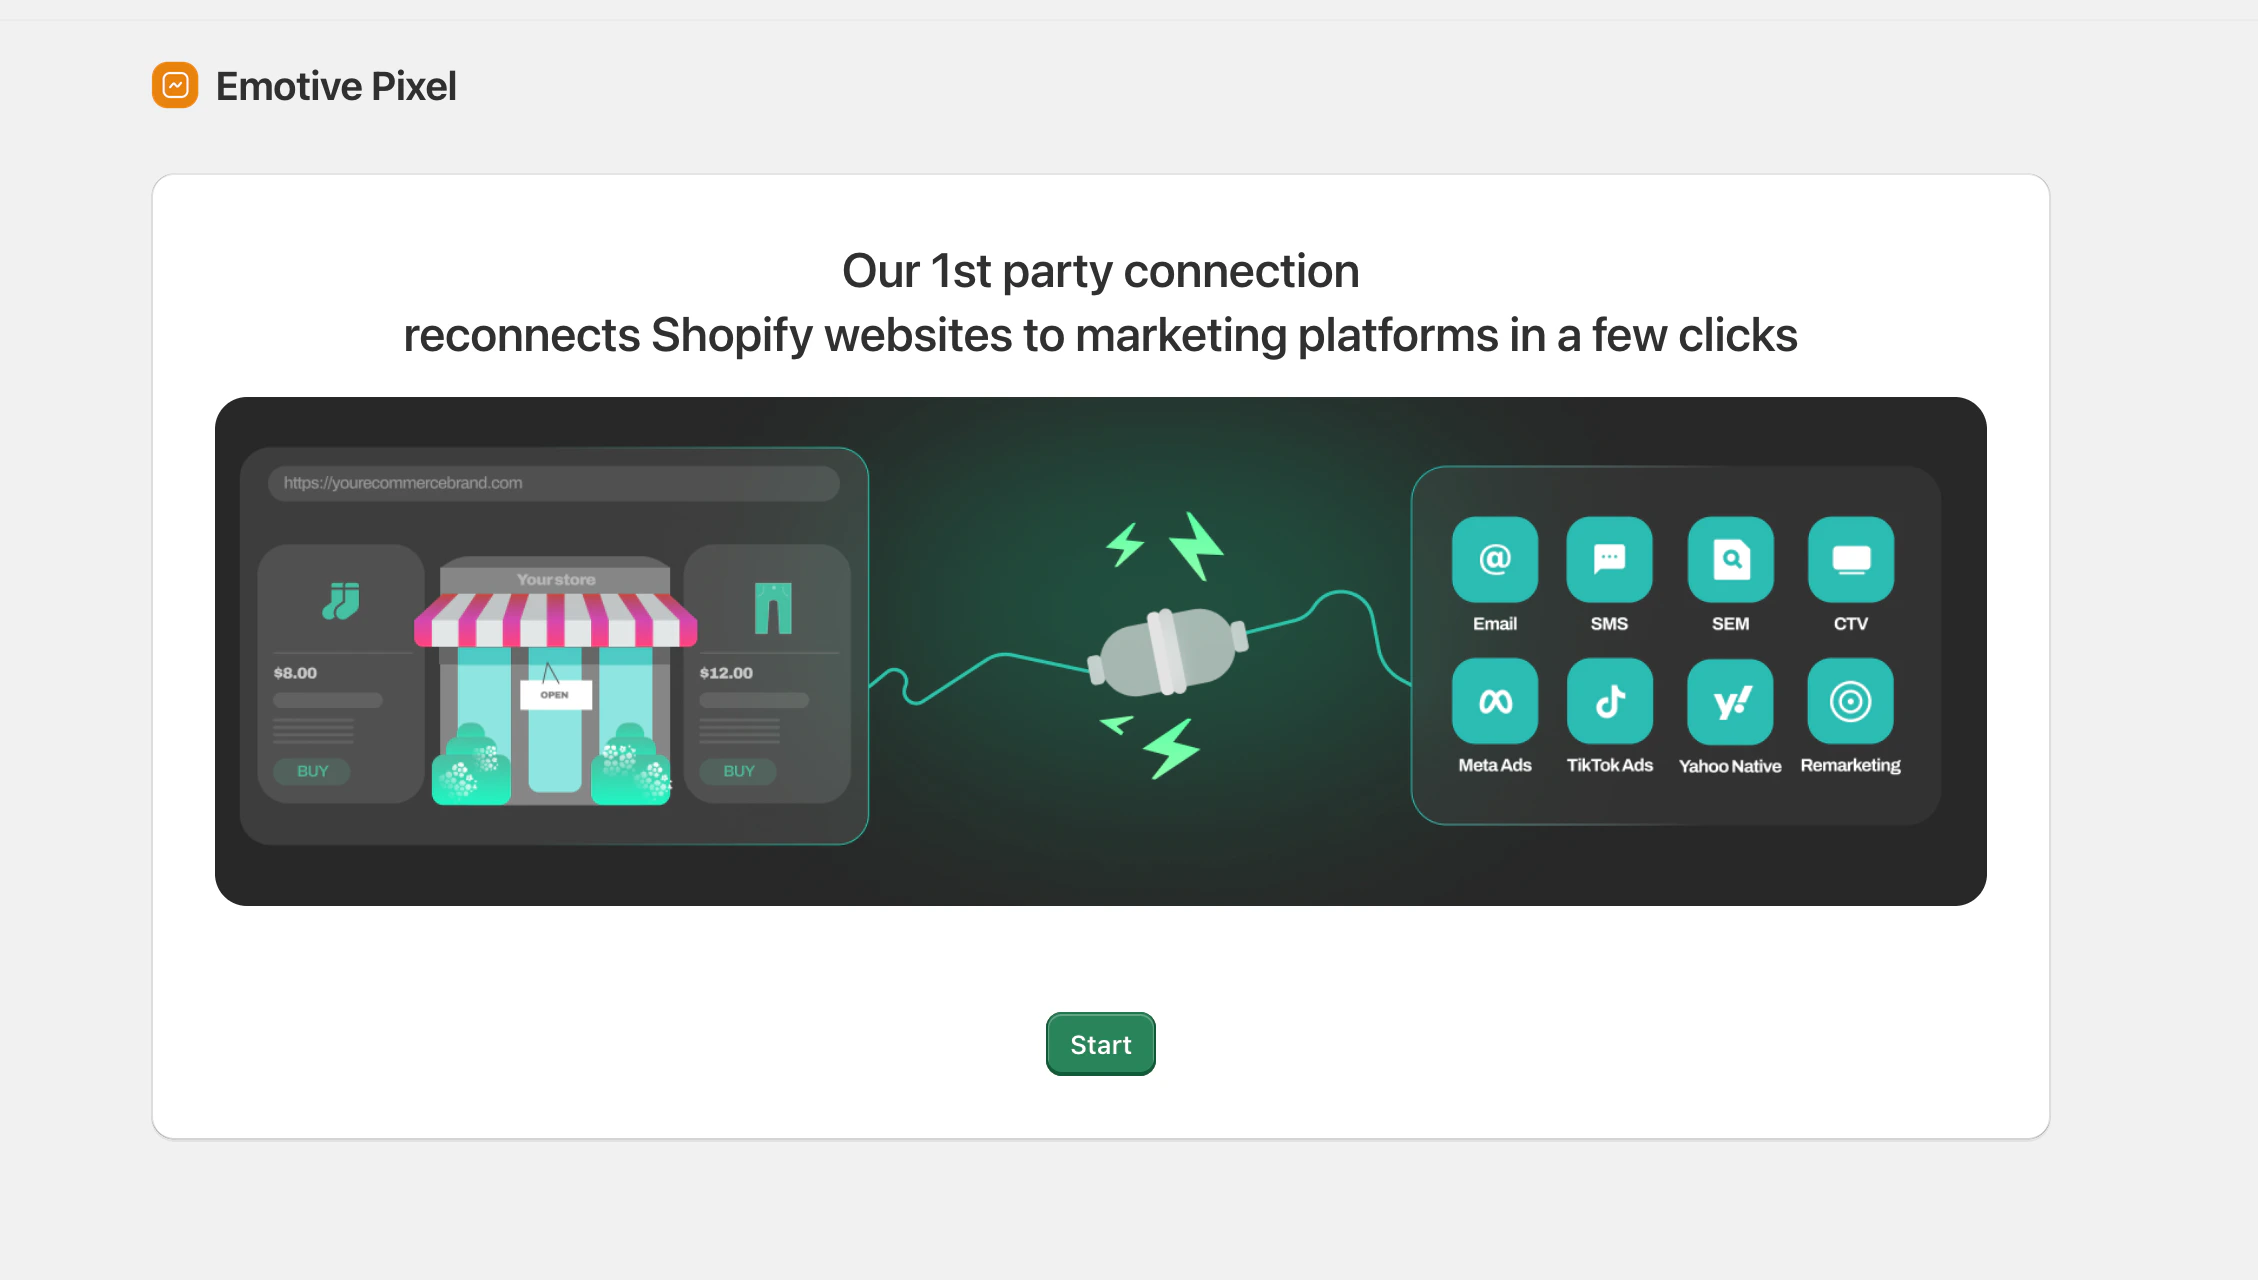
* Navigate to the Shopify App Store and head to the [Emotive CartAI](https://apps.shopify.com/emotive-pixel) app.
* Click **Install**.
 ## Verify your DNS Records
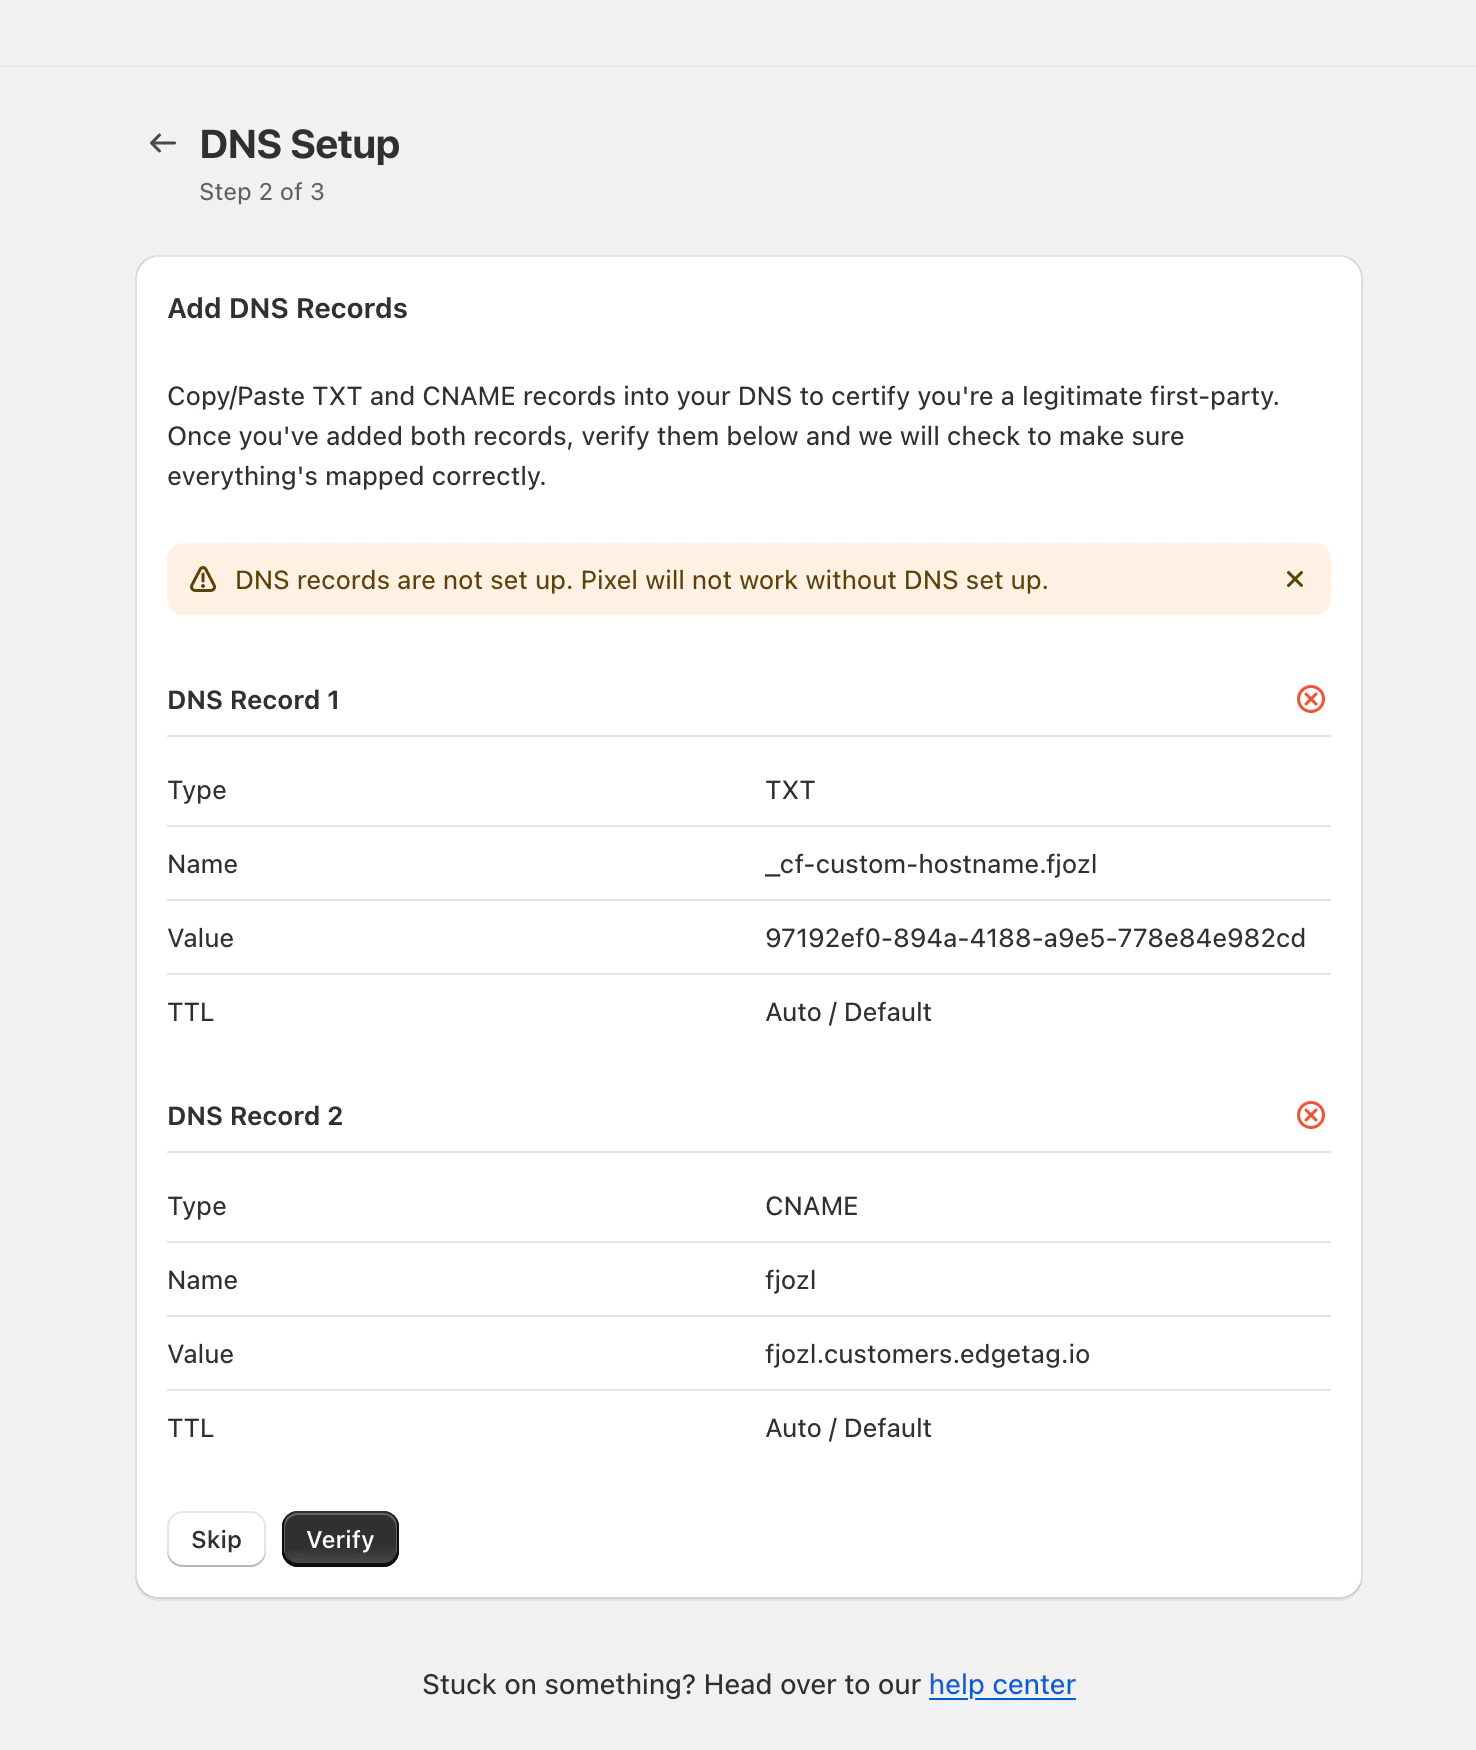
After installing the Emotive CartAI app on your store, you will need to add two DNS records in your domain host. Shopify will provide the Type, Name, and Value details for each record.
To add these records:
* Log into your domain host.
* Search for **Manage DNS** or **Add Custom Records** (this may vary depending on your provider).
* Carefully add both into your DNS records. Be sure that you don't add any extra spaces or characters.
* Head back to your Shopify Emotive CartAI setup and click to **Verify** your records.
## Verify your DNS Records
After installing the Emotive CartAI app on your store, you will need to add two DNS records in your domain host. Shopify will provide the Type, Name, and Value details for each record.
To add these records:
* Log into your domain host.
* Search for **Manage DNS** or **Add Custom Records** (this may vary depending on your provider).
* Carefully add both into your DNS records. Be sure that you don't add any extra spaces or characters.
* Head back to your Shopify Emotive CartAI setup and click to **Verify** your records.
 ## Add Custom Pixel
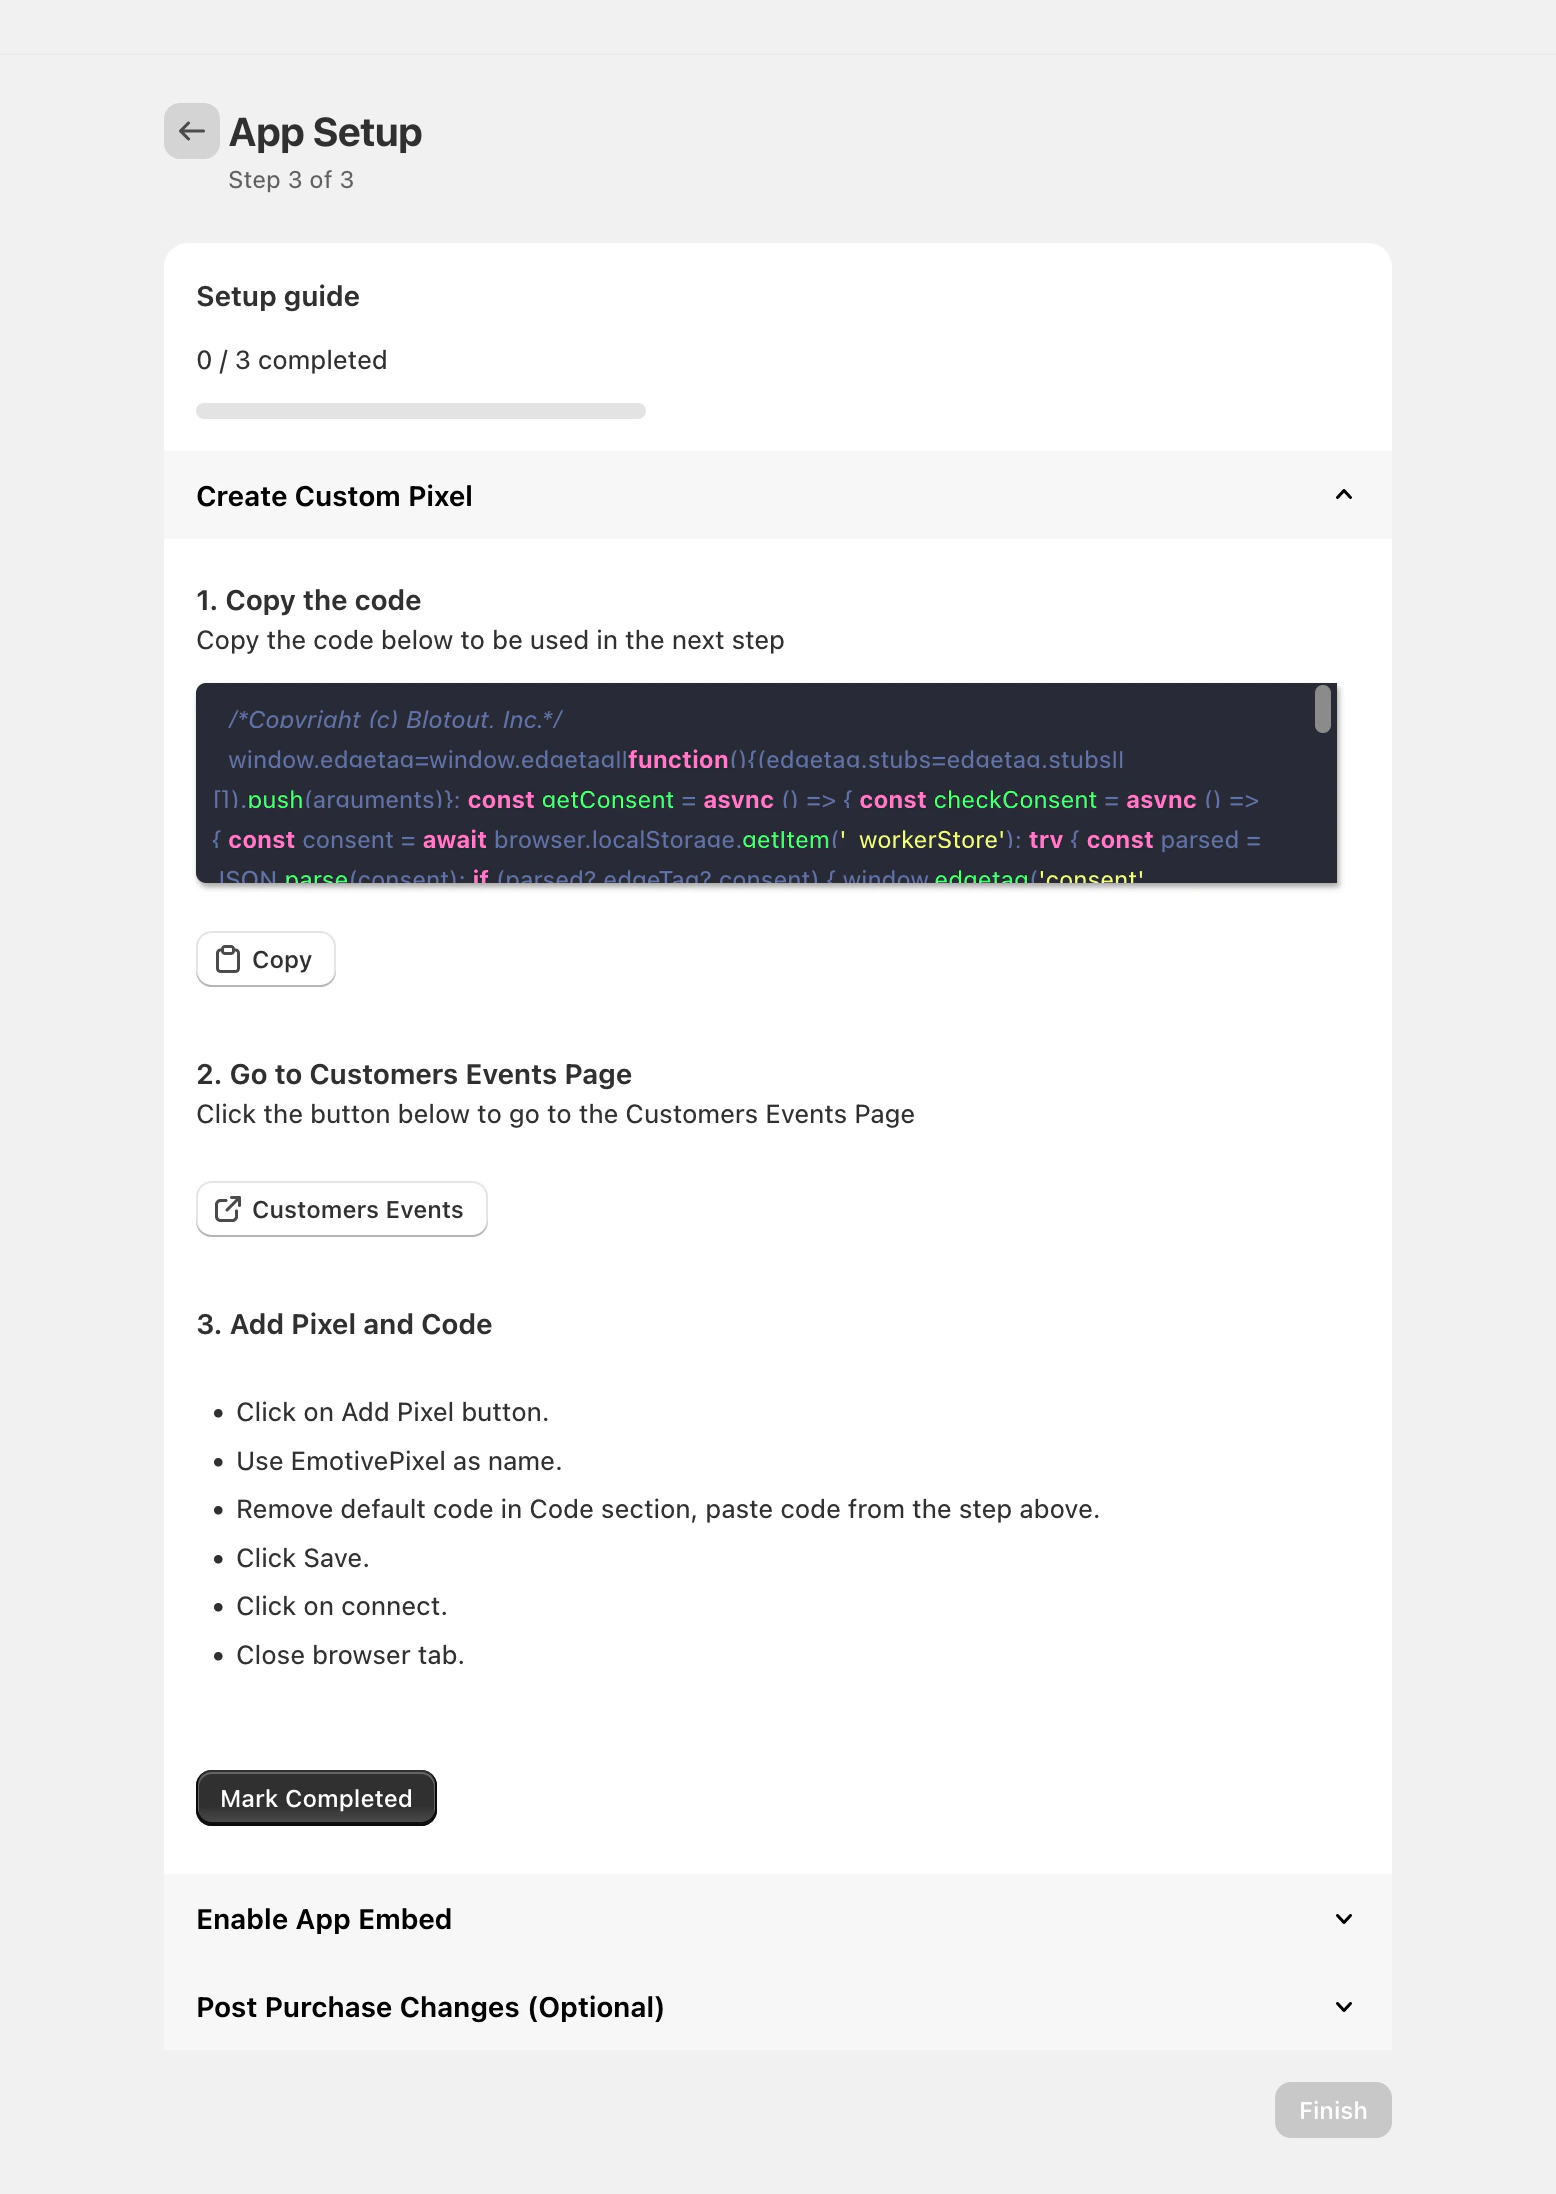
Next, you will be asked to install the custom Emotive CartAI pixel to your Shopify theme and enable it in your Shopify Theme Builder.
To install your pixel:
* Under Step 1, click to **Copy** the code.
* Under Step 2, click to navigate to your **Customer Events** page in Shopify.
* Select **Add Custom Pixel**.
* Name your Pixel Emotive CartAI.
* Remove the default code shown.
* Paste the code that you copied in Step 1.
* Click on **Permission** and select **NOT REQUIRED.**
* Click on **Data Sale** and select **Data collected does not qualify as data sale**
* Click to **Save** your changes.
* Click **Connect,** then close your tab.
## Add Custom Pixel
Next, you will be asked to install the custom Emotive CartAI pixel to your Shopify theme and enable it in your Shopify Theme Builder.
To install your pixel:
* Under Step 1, click to **Copy** the code.
* Under Step 2, click to navigate to your **Customer Events** page in Shopify.
* Select **Add Custom Pixel**.
* Name your Pixel Emotive CartAI.
* Remove the default code shown.
* Paste the code that you copied in Step 1.
* Click on **Permission** and select **NOT REQUIRED.**
* Click on **Data Sale** and select **Data collected does not qualify as data sale**
* Click to **Save** your changes.
* Click **Connect,** then close your tab.
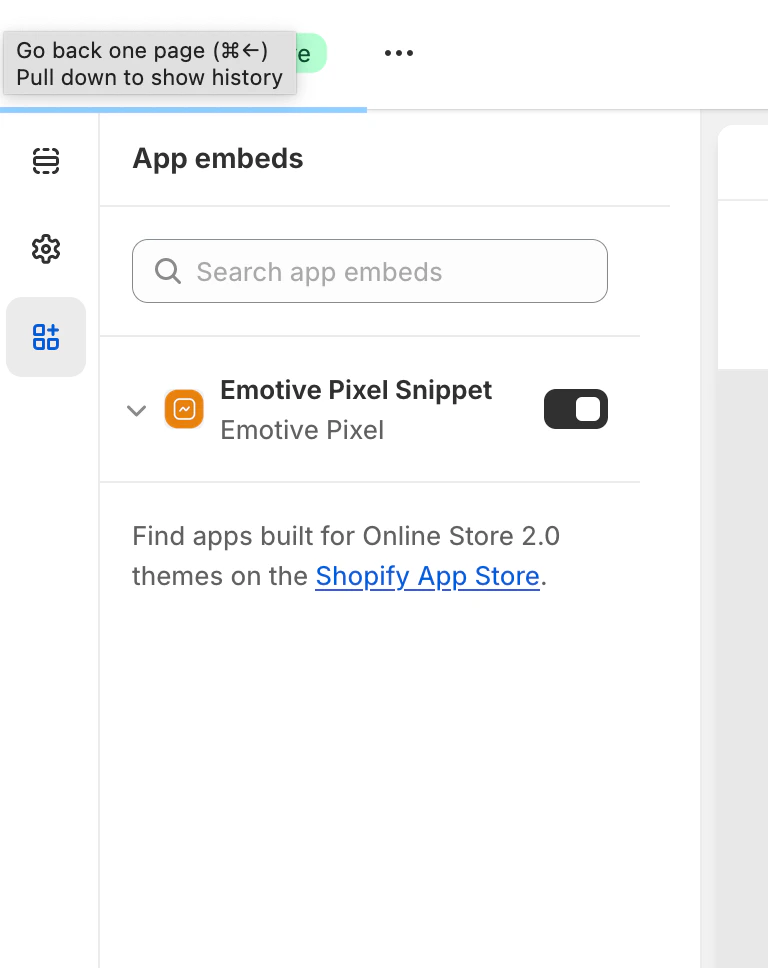
 Once you've added your custom pixel, you'll need to enable it in your Shopify Theme Builder.
To enable Emotive CartAI:
* Click on the **Theme Customization** link in the Shopify app.
* Toggle ON the Emotive CartAI Snippet on the left side bar.
* Click to **Save.**
* Head back to the Shopify App and click to **Finish.**
Once you've added your custom pixel, you'll need to enable it in your Shopify Theme Builder.
To enable Emotive CartAI:
* Click on the **Theme Customization** link in the Shopify app.
* Toggle ON the Emotive CartAI Snippet on the left side bar.
* Click to **Save.**
* Head back to the Shopify App and click to **Finish.**
 ## Connecting your Channels
Now that you've installed Emotive CartAI and enabled it in your Shopify Theme Builder, you'll want to connect all applicable channels to the app. Please reach out to your Customer Success Manager or our Support Team at [support@emotive.io](mailto:support@emotive.io) in order to get this done.
Any time that you change or update your Shopify Theme, please ensure that you re-enable your CartAI Pixel in the Shopify Theme Builder using the instructions above.
## Connecting your Channels
Now that you've installed Emotive CartAI and enabled it in your Shopify Theme Builder, you'll want to connect all applicable channels to the app. Please reach out to your Customer Success Manager or our Support Team at [support@emotive.io](mailto:support@emotive.io) in order to get this done.
Any time that you change or update your Shopify Theme, please ensure that you re-enable your CartAI Pixel in the Shopify Theme Builder using the instructions above.