> ## Documentation Index
> Fetch the complete documentation index at: https://help.emotive.io/llms.txt
> Use this file to discover all available pages before exploring further.
# Connect Jotform <> Emotive
> Learn how to sync Jotform signups to Emotive.
This article will provide steps on how to setup your Jotform to sync your subscriber data into Emotive and enter them into a Welcome Flow.
## Create your List Growth API in Emotive
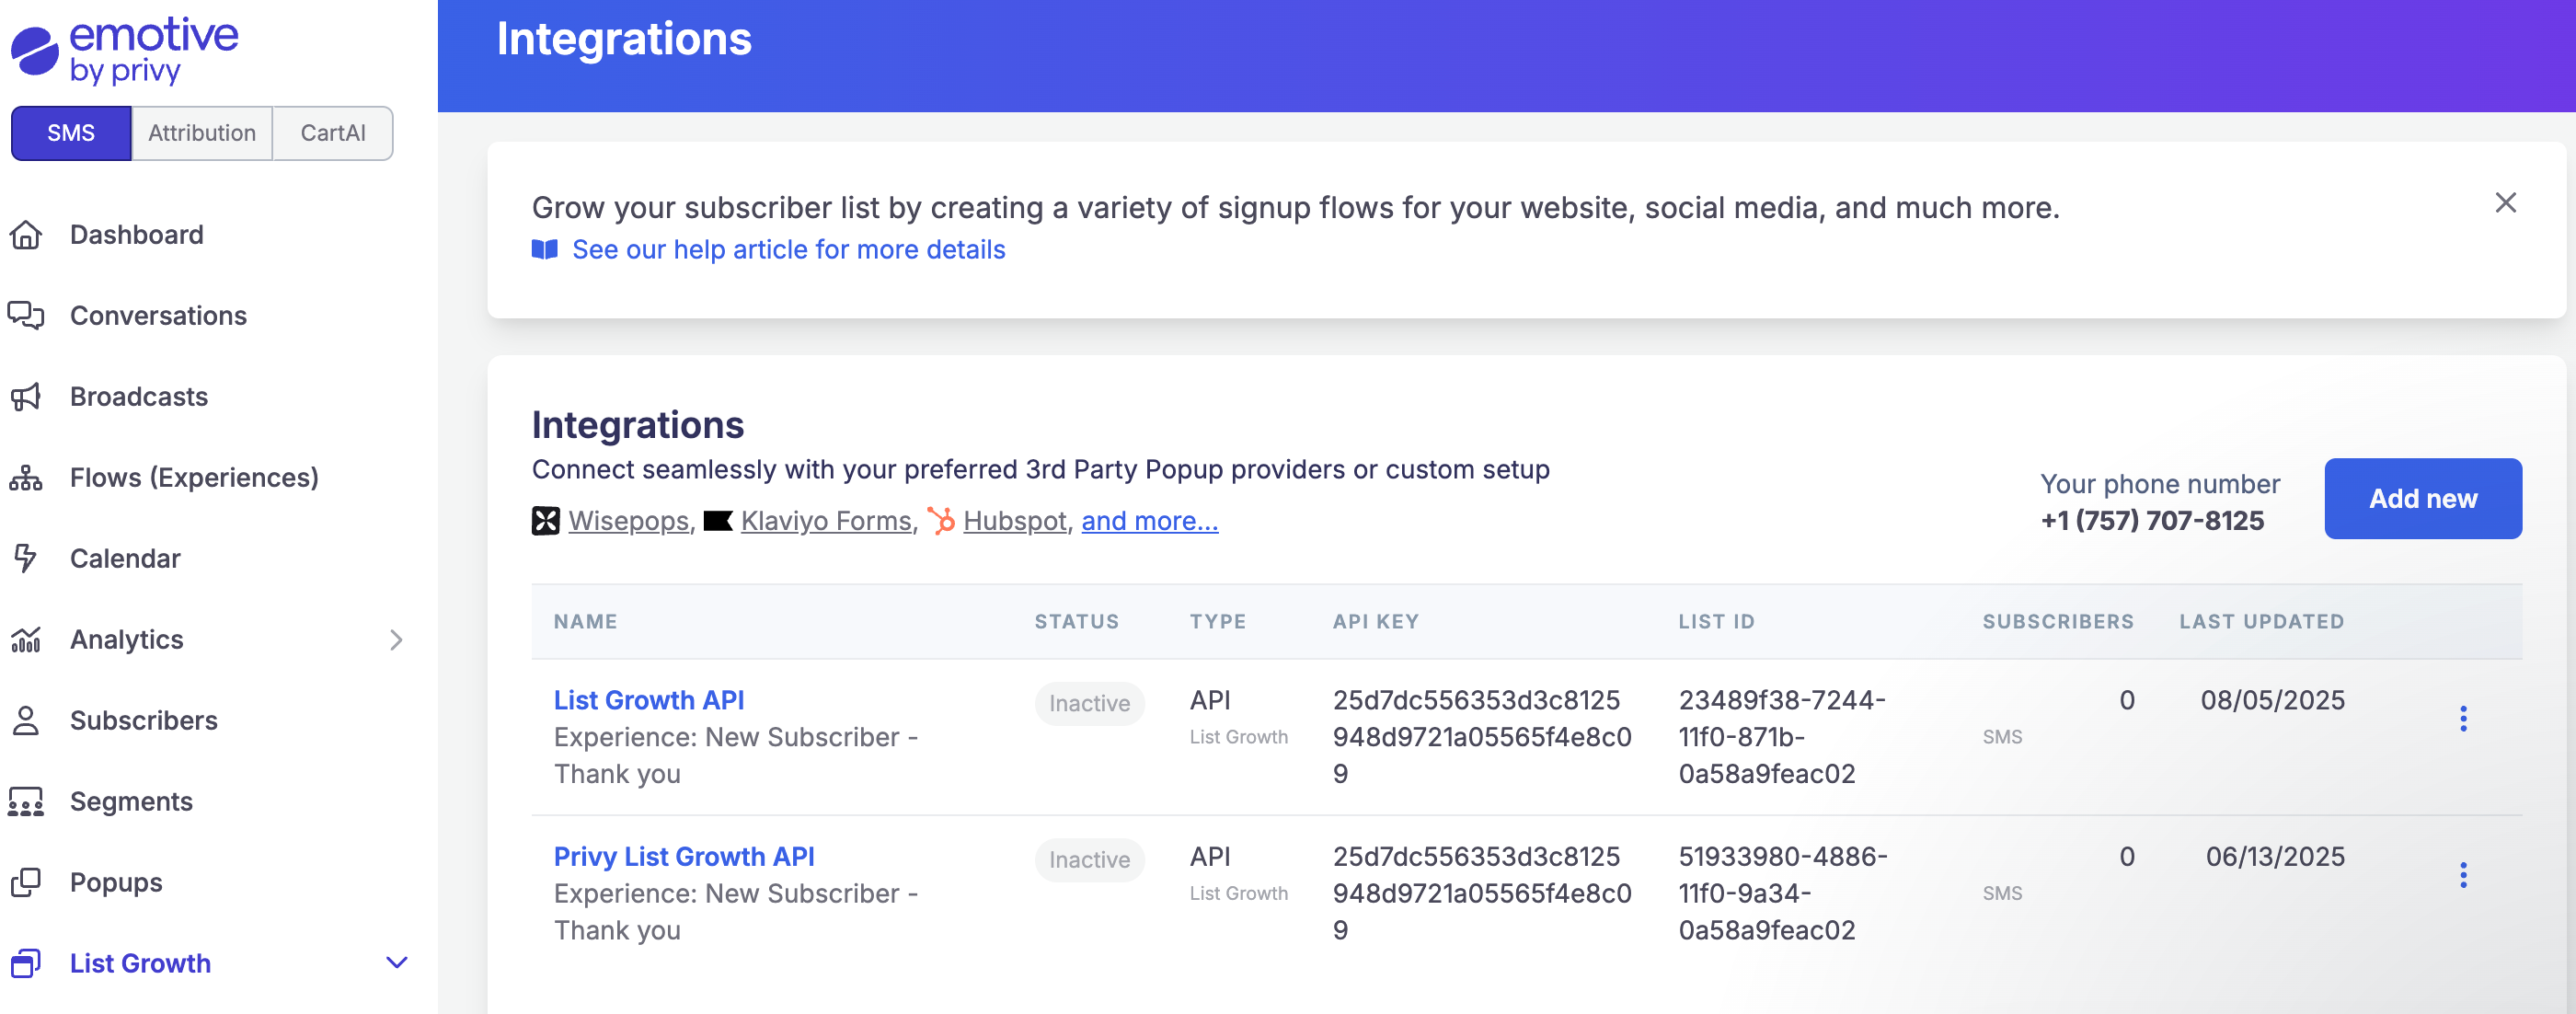
* Navigate to **List Growth** and head to your [Integrations](https://www.emotiveapp.co/list-growth/tools) page.
* Click **Add new**.
* Select **Add new List Growth API**.
* Name your new API something easy to identify, such as "List Growth API - Jotform".
* Select which Flow you'd like your new Jotform signups to enter.
* Click **Next**.
* Copy your new API's "List ID".
 ## Install Jotform on Emotive
* Navigate to [Integrations](https://www.emotiveapp.co/settings/integrations).
* Locate **Jotform** and select **Add Integration**.
* Click **Install**.
* Enter your Emotive List ID (from the previous section) into the modal and click **Finish**.
## Obtain a Webhook URL
Once you have created your new List Growth API and installed Jotform on Emotive, you will need to reach out to [Support@emotive.io](mailto:Support@emotive.io) to obtain your webhook URL.
## Complete Jotform Setup
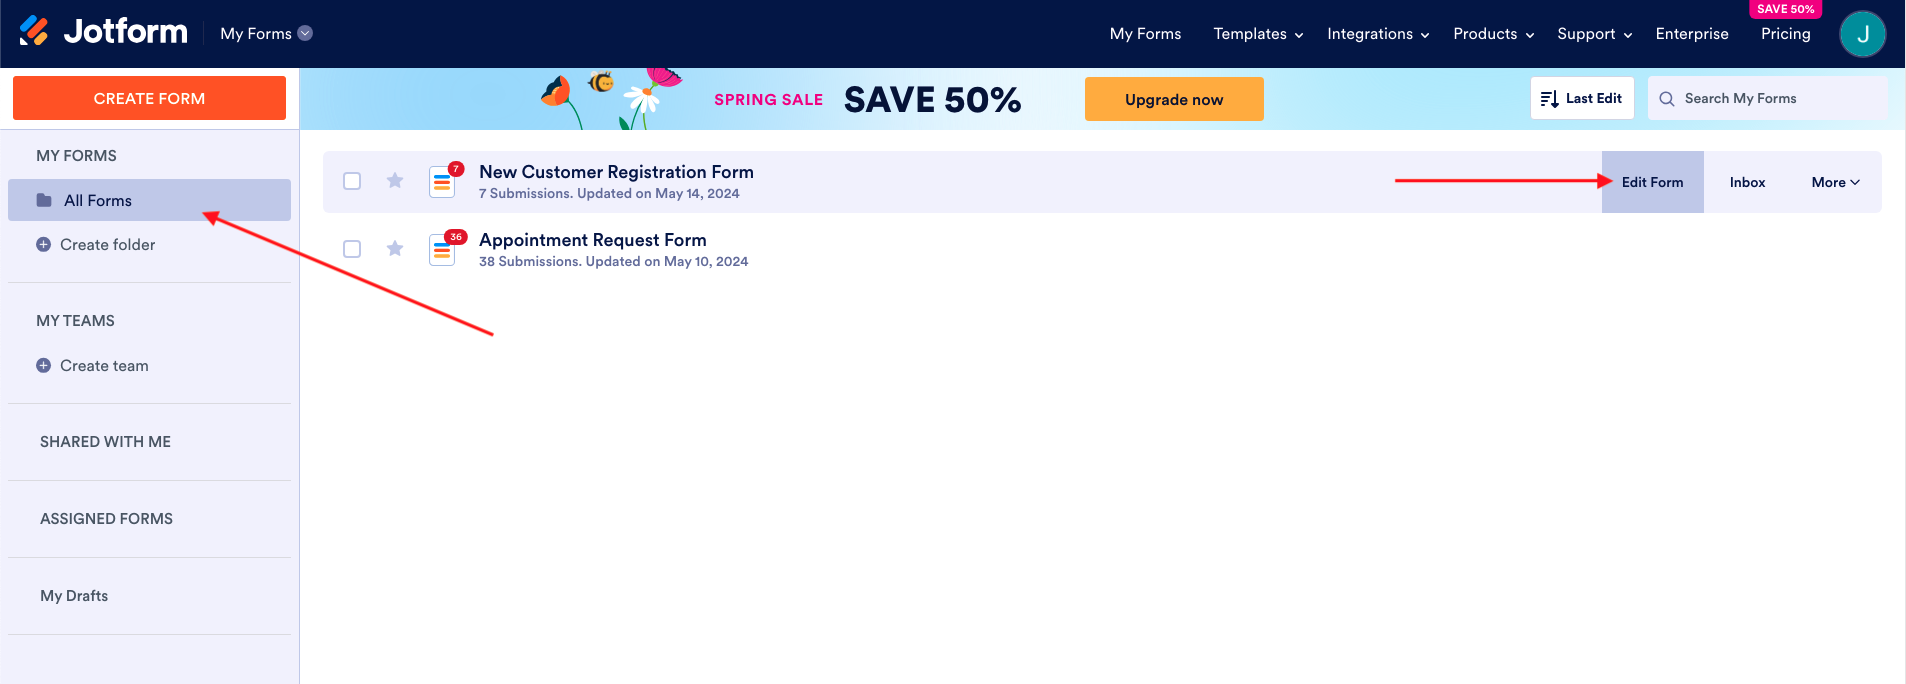
* Log into Jotform and navigate to **All Forms.**
* Edit the form you'll be using to sync subscriber data to Emotive.
## Install Jotform on Emotive
* Navigate to [Integrations](https://www.emotiveapp.co/settings/integrations).
* Locate **Jotform** and select **Add Integration**.
* Click **Install**.
* Enter your Emotive List ID (from the previous section) into the modal and click **Finish**.
## Obtain a Webhook URL
Once you have created your new List Growth API and installed Jotform on Emotive, you will need to reach out to [Support@emotive.io](mailto:Support@emotive.io) to obtain your webhook URL.
## Complete Jotform Setup
* Log into Jotform and navigate to **All Forms.**
* Edit the form you'll be using to sync subscriber data to Emotive.
 * Update your form elements.
### Update your Webhook Settings
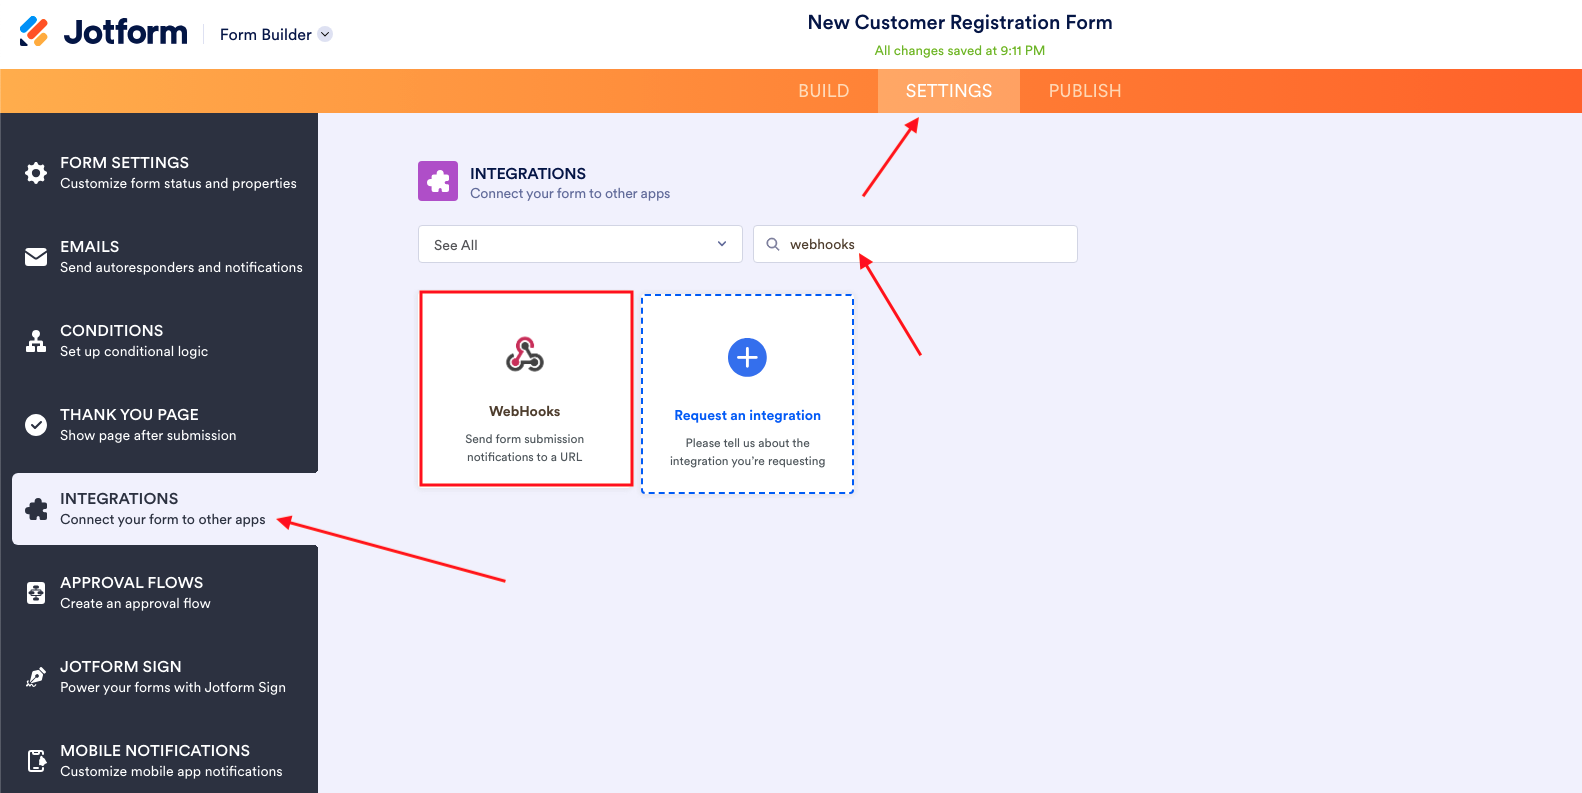
* Head to **Settings > Integrations**.
* Search for and select **WebHooks**.
* Update your form elements.
### Update your Webhook Settings
* Head to **Settings > Integrations**.
* Search for and select **WebHooks**.
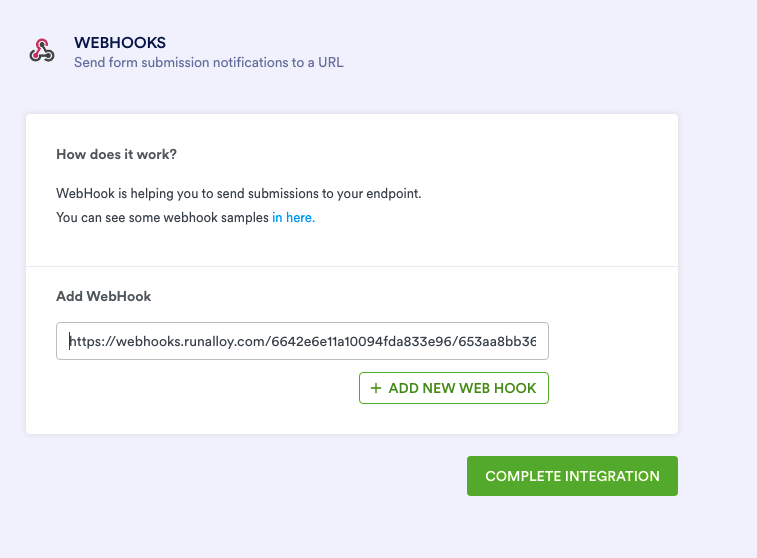
 * Paste the webhook URL provided by the Emotive support team.
* Select **Complete Integration.**
* Paste the webhook URL provided by the Emotive support team.
* Select **Complete Integration.**
 That's it! Your Jotform signups will now sync to Emotive moving forward.