> ## Documentation Index
> Fetch the complete documentation index at: https://help.emotive.io/llms.txt
> Use this file to discover all available pages before exploring further.
# Connect Zendesk <> Emotive
> Sync conversations and data from Emotive to Zendesk.
## Features of the Integration
Our goal with our Zendesk integration is to allow you to manage all of your Emotive conversations right from within Zendesk.
* New conversations that happen in Emotive create tickets in Zendesk
* Opt out shoppers directly from Zendesk via keyword #optout or #opt-out
* All customer responses from Emotive are added to the same, open ticket in Zendesk
* Conversations that Emotive starts with customers will sync to provide context for where the conversation was handed off to Zendesk
* Responding to a ticket in Zendesk sends a message via Emotive to the customer
* Closing a ticket in Zendesk closes a Conversation in Emotive
* When we learn the customers name from an order or an abandoned checkout, we'll update the user profile in Zendesk with their first and last name on the next ticket that is opened
* All new tickets are tagged emotive for easier filtering and conversation management in Zendesk
* Strip signatures saved in Zendesk from all responses to customers
## Create API Token in Zendesk
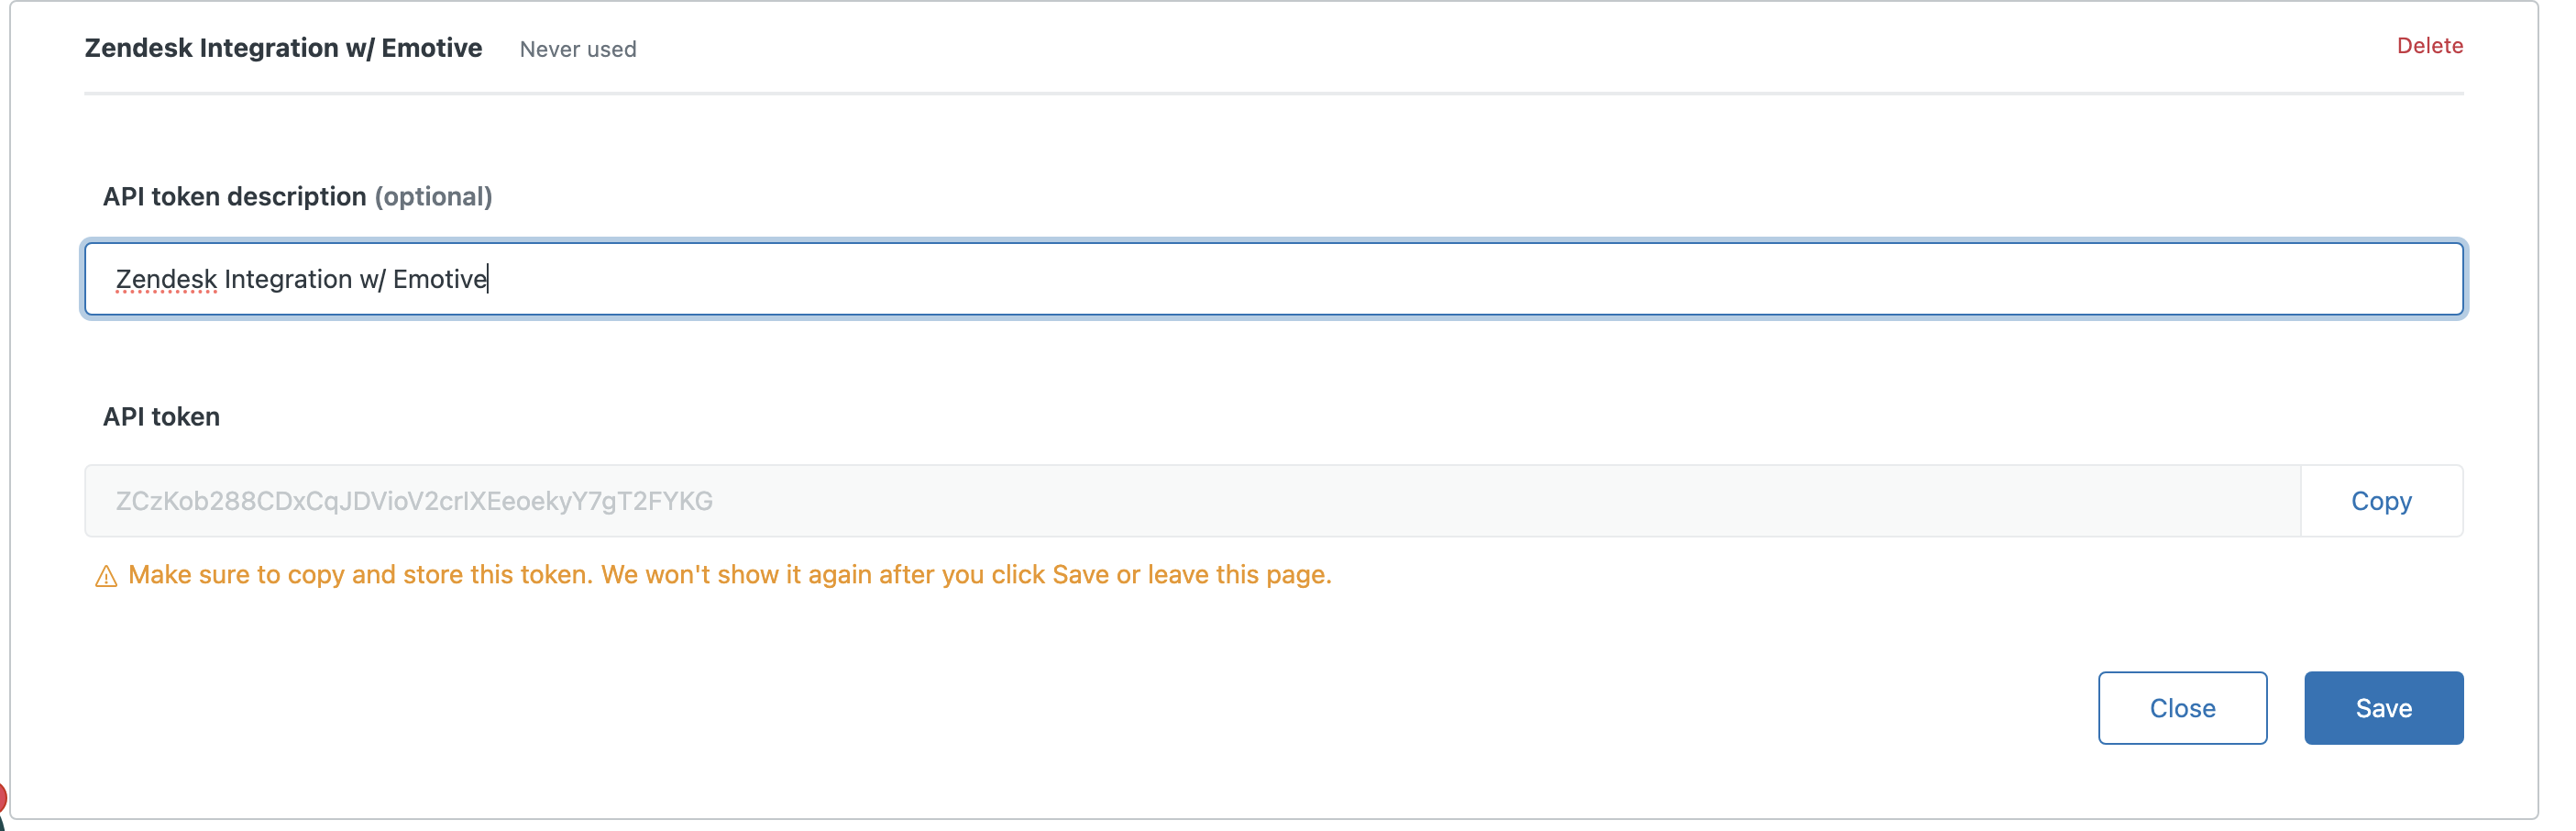
1. Log into Zendesk and navigate to **Apps and Integrations > APIs**.
2. Select **Zendesk API**.
3. Add the following API token description: "Zendesk Integration with Emotive".
4. Copy the API Token and click **Save**.
 ## Install Zendesk on Emotive
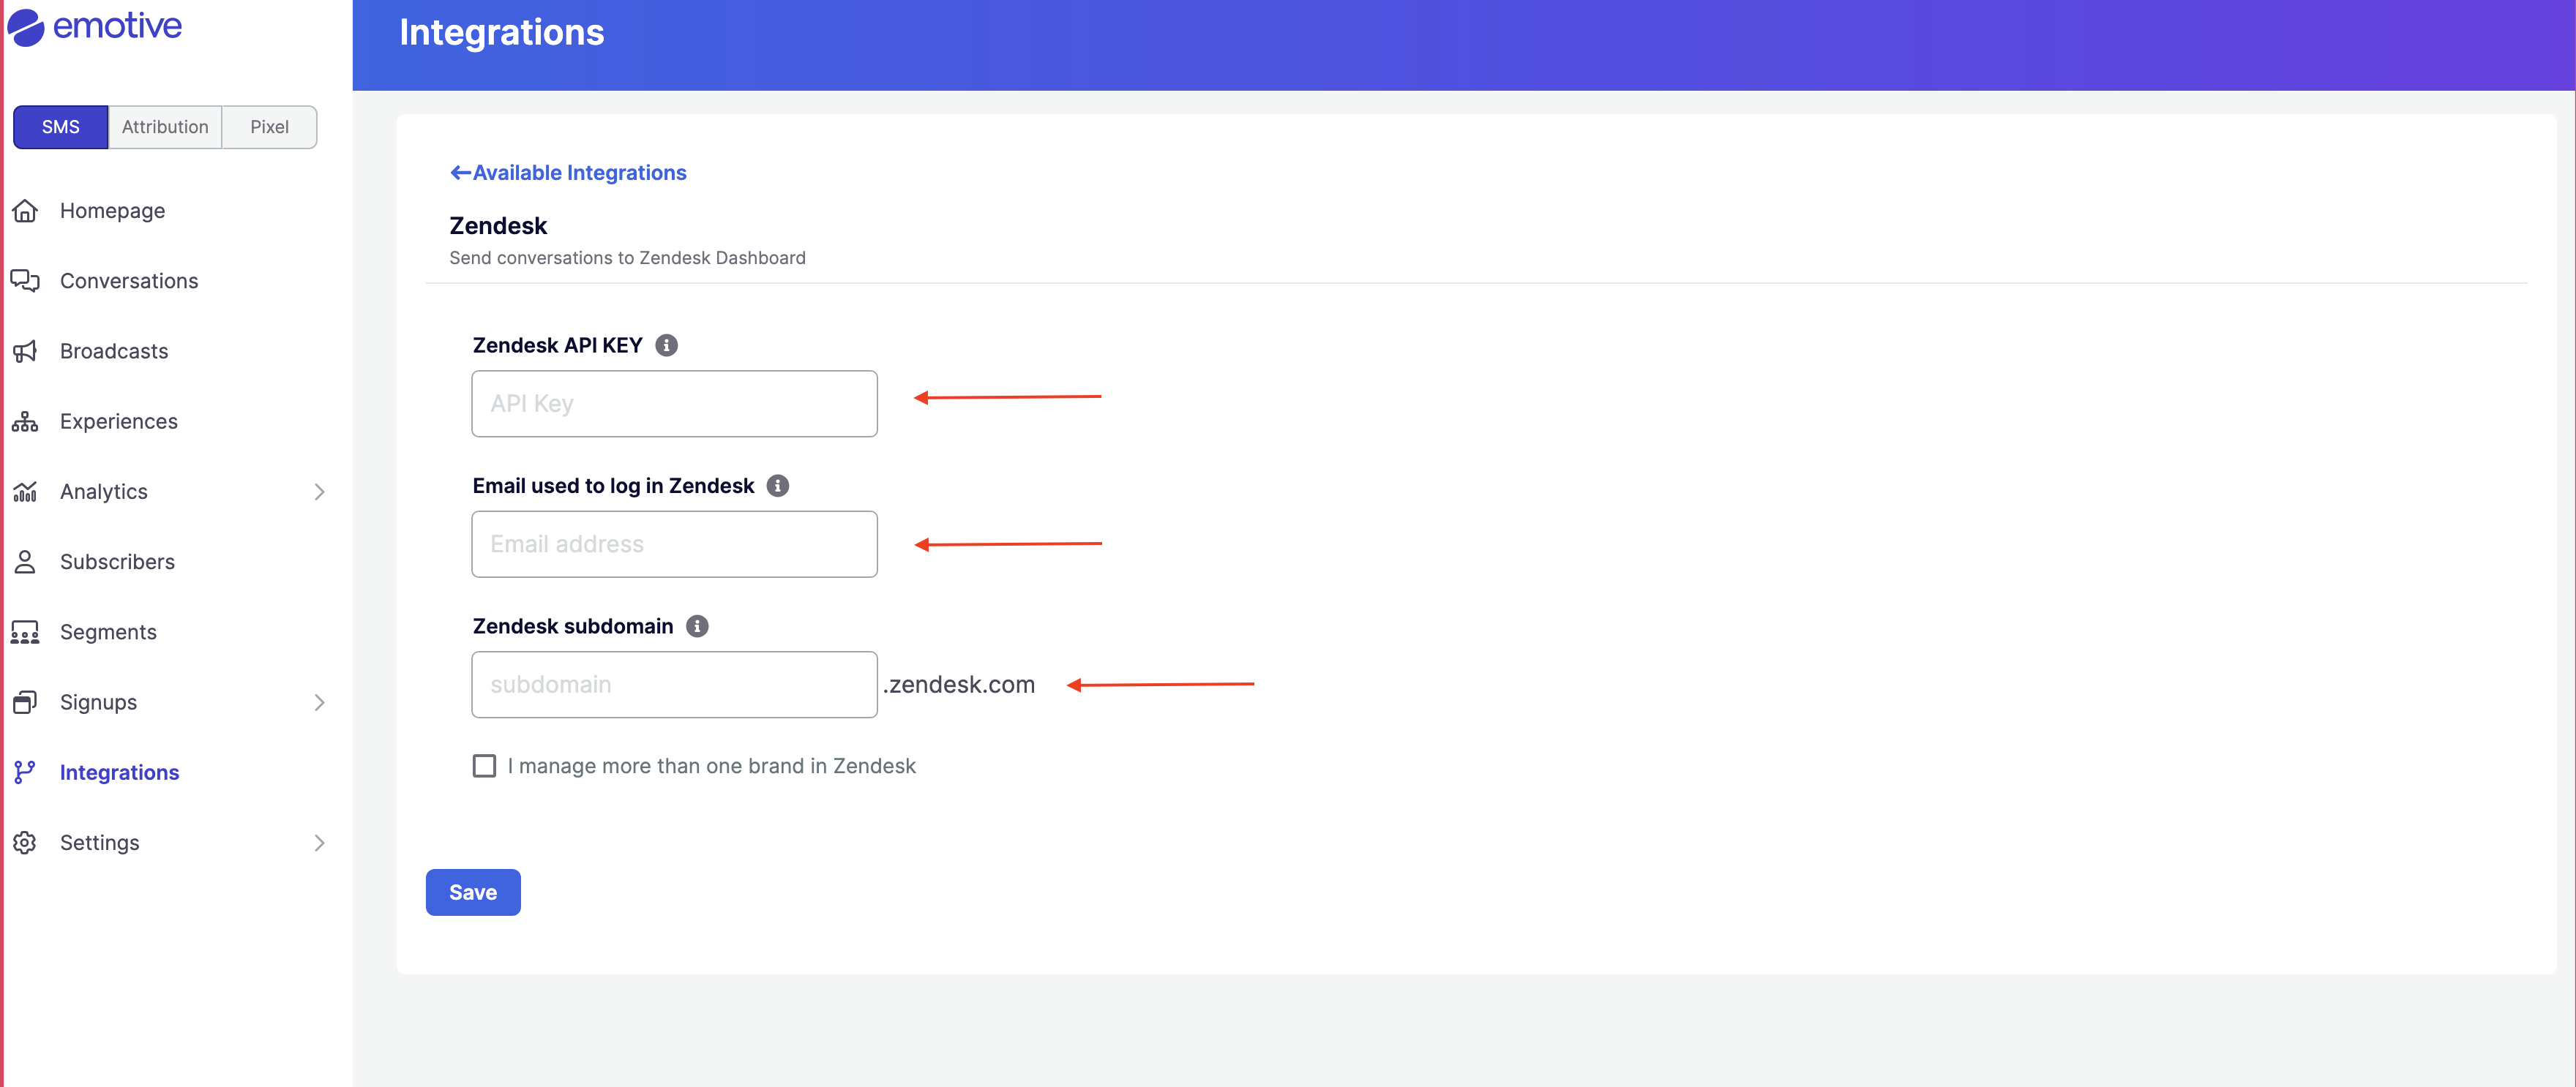
* Navigate to [Integrations](https://www.emotiveapp.co/settings/integrations).
* Locate **Zendesk** and select **Add Integration**.
* Enter your Zendesk API Key.
* Include your email used for Zendesk (needs to be an admin email address).
* Include your Zendesk subdomain (if it is emotive123.zendesk.com, your subdomain would be emotive123).
* Click **Save Changes**.
## Install Zendesk on Emotive
* Navigate to [Integrations](https://www.emotiveapp.co/settings/integrations).
* Locate **Zendesk** and select **Add Integration**.
* Enter your Zendesk API Key.
* Include your email used for Zendesk (needs to be an admin email address).
* Include your Zendesk subdomain (if it is emotive123.zendesk.com, your subdomain would be emotive123).
* Click **Save Changes**.
 That's it! Your Zendesk account is now integrated with Emotive.
## Managing Multiple Brands on Zendesk
If you manage more than one account on Zendesk, you will need to create settings in Emotive for each account.
First, find the Brand Name in Zendesk:
* In Zendesk, Go to the Admin Menu and navigate to **Account**.
* Under the *Branding* tab, locate your **Brands Menu**
* Click on the desired brand from the list.
* Copy the **Brand Name**.
**Note:** If you do not have "Brands Menu" under the Branding tab within the Account menu, you need not worry about this setting.
Next, update this information in Emotive:
* Log into Emotive and navigate to **Integrations**.
* Head to your Zendesk integration.
* Select the *I manage more than one brand in Zendesk* checkbox.
* Paste your Zendesk **Brand Name**.
* Click **Save Changes**.
That's it! Your Zendesk account is now integrated with Emotive.
## Managing Multiple Brands on Zendesk
If you manage more than one account on Zendesk, you will need to create settings in Emotive for each account.
First, find the Brand Name in Zendesk:
* In Zendesk, Go to the Admin Menu and navigate to **Account**.
* Under the *Branding* tab, locate your **Brands Menu**
* Click on the desired brand from the list.
* Copy the **Brand Name**.
**Note:** If you do not have "Brands Menu" under the Branding tab within the Account menu, you need not worry about this setting.
Next, update this information in Emotive:
* Log into Emotive and navigate to **Integrations**.
* Head to your Zendesk integration.
* Select the *I manage more than one brand in Zendesk* checkbox.
* Paste your Zendesk **Brand Name**.
* Click **Save Changes**.
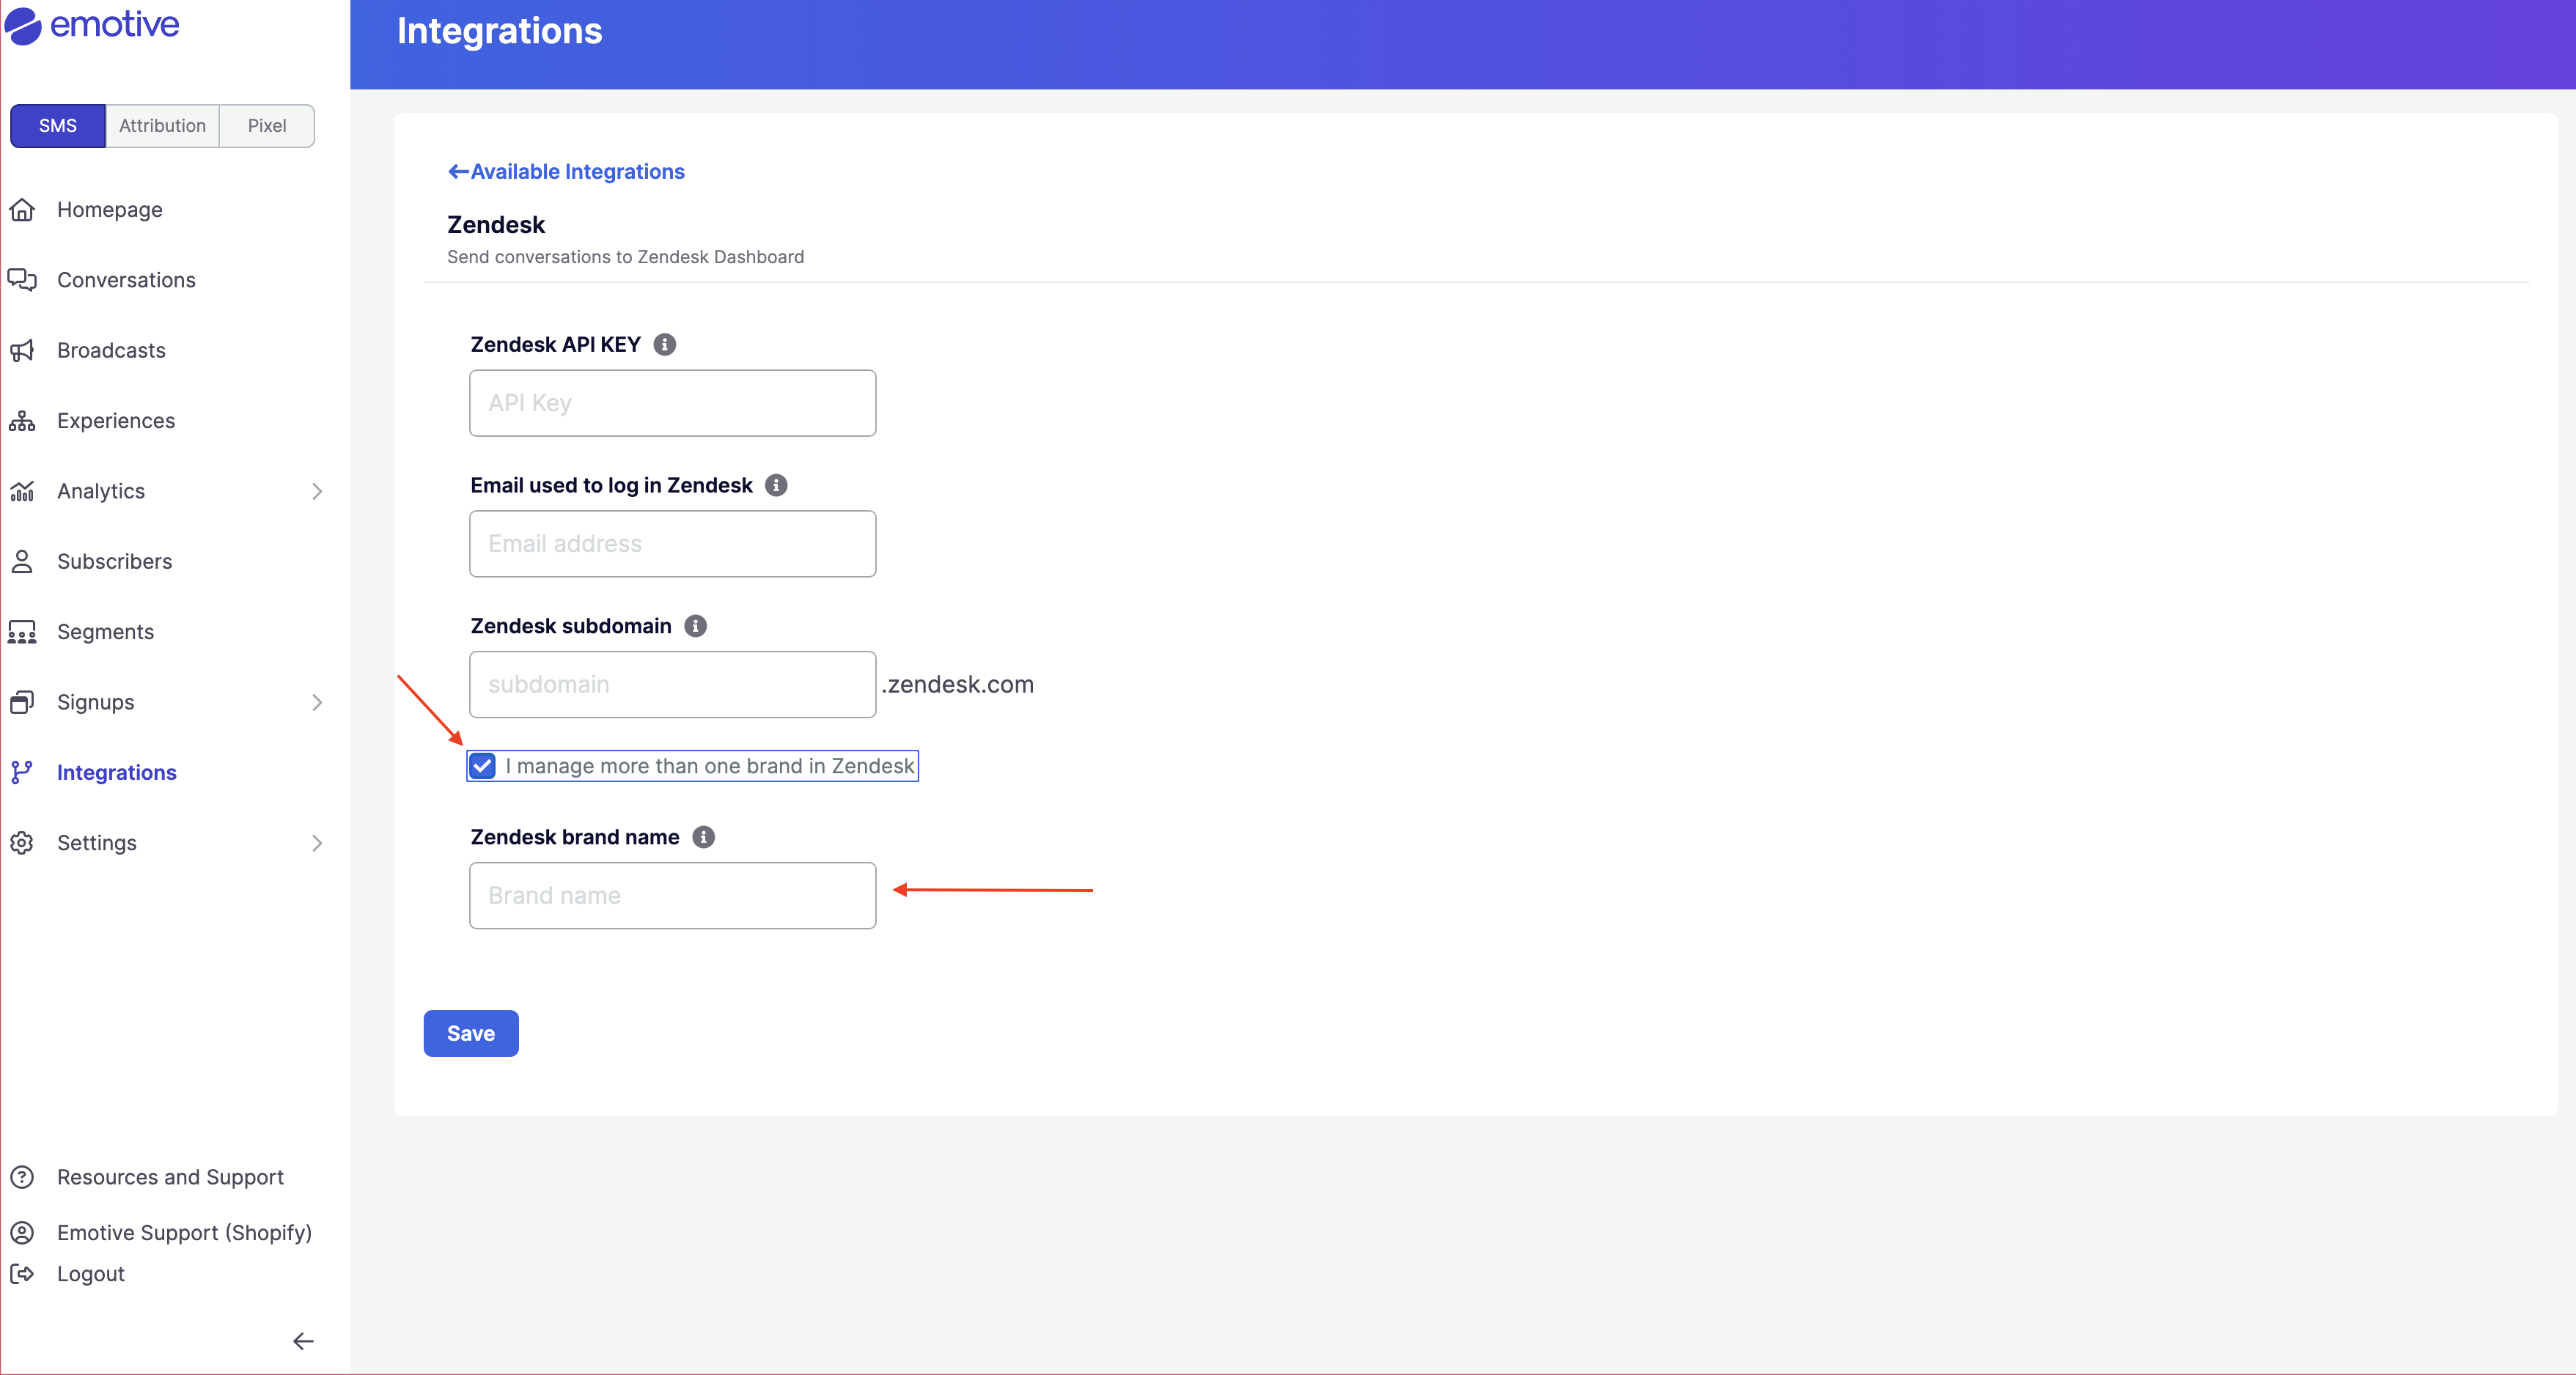 **Note:** The Zendesk API key, email address and Zendesk subdomain do not need to be changed as its common across multiple sub-accounts.