Connect your BayEngage Account
- Navigate to Integrations in your Emotive dashboard.
- Locate BayEngage and select Add Integration.
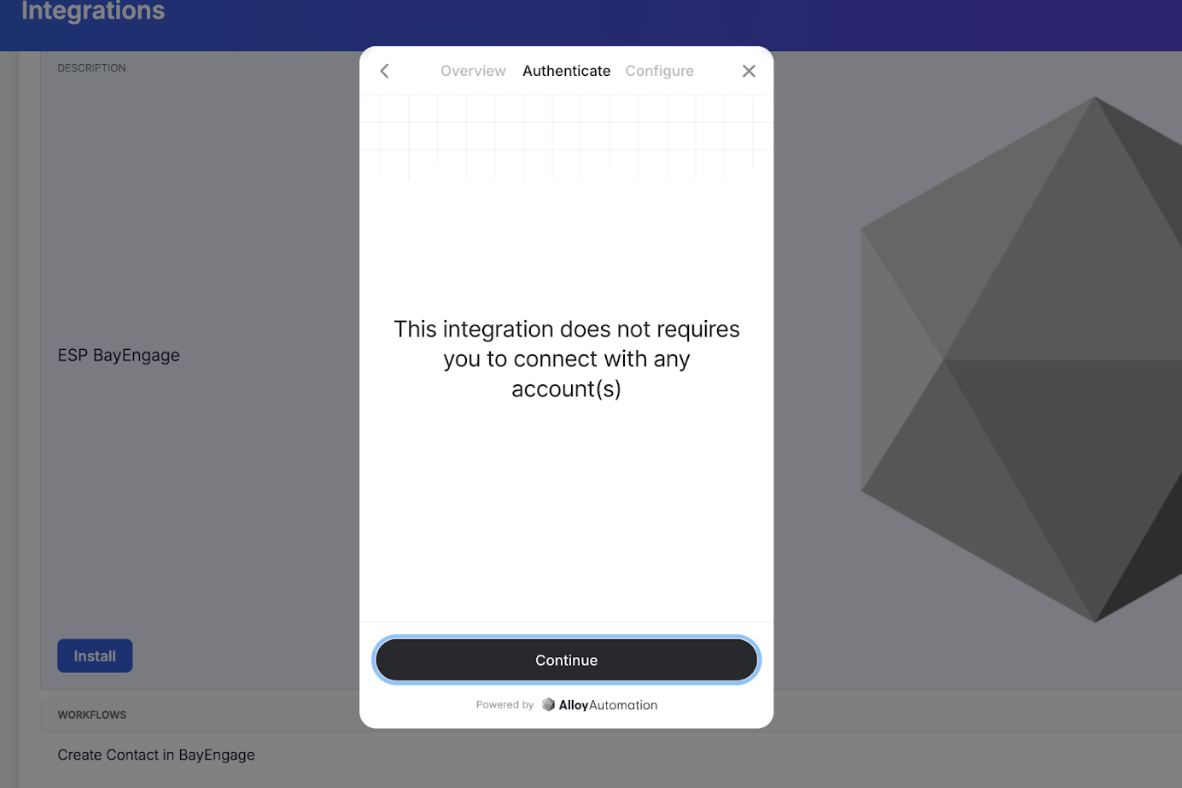
- Select Install and Confirm your decision.
- Click Continue to begin authenticating your account.
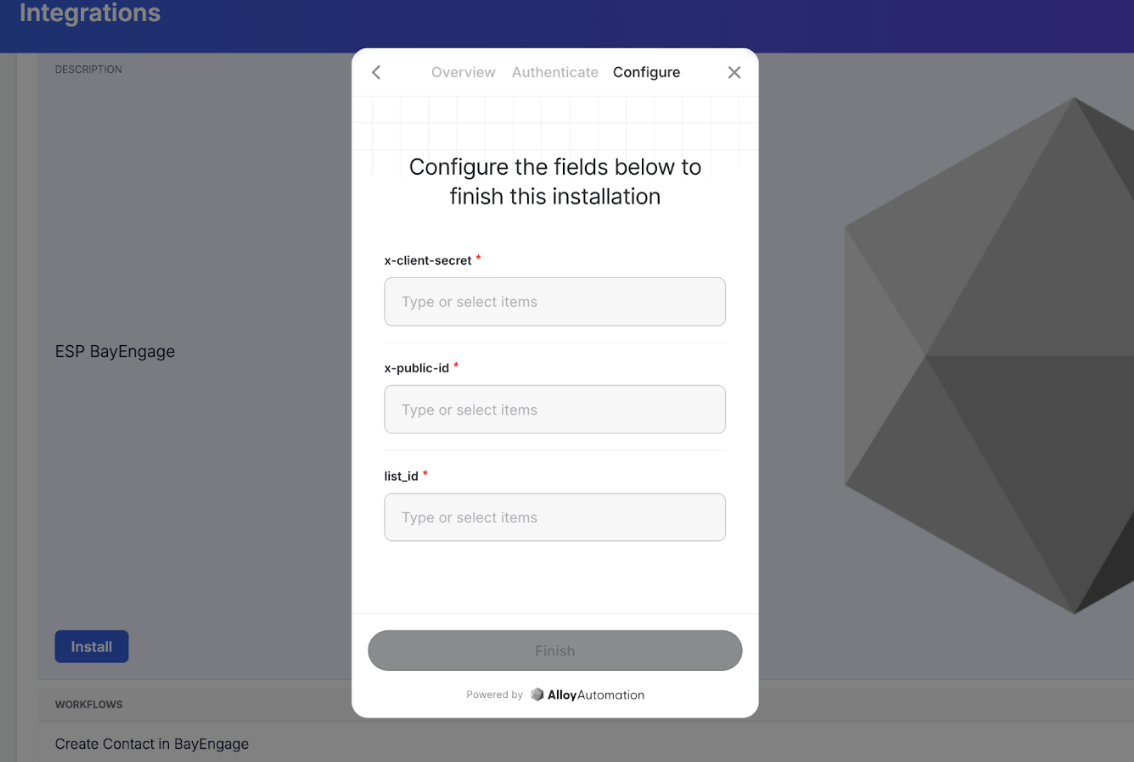
x_client_secret
x_client_secret
- Log into your BayEngage account.
- From the left menu, navigate to Apps > Custom Integrations.
-
Generate and copy your Client Secret (private key).
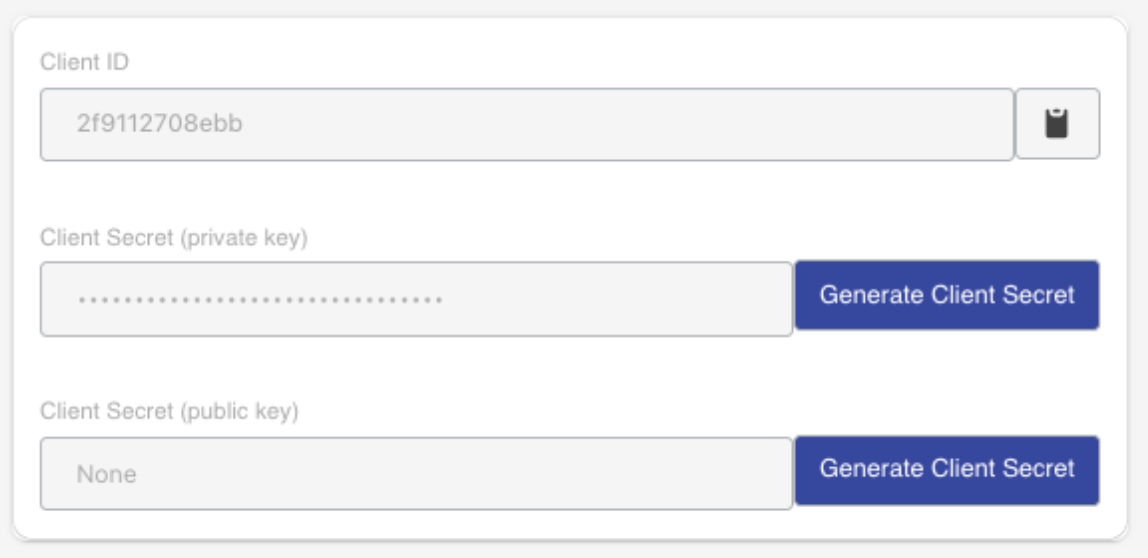
- Paste into the x_client_secret field in Emotive.
x_public_id
x_public_id
- Log into your BayEngage account.
- From the left menu, navigate to Apps > Custom Integrations.
-
Generate and copy your Client Secret (public key).
- Paste into the x_public_id field in Emotive.
list_id
list_id
- Log into BayEngage and head to your Lists & Segments.
- Click on Create Contact List and name it “Emotive Subscribers” for easy identification.
-
When prompted to import contacts, click the Back button.
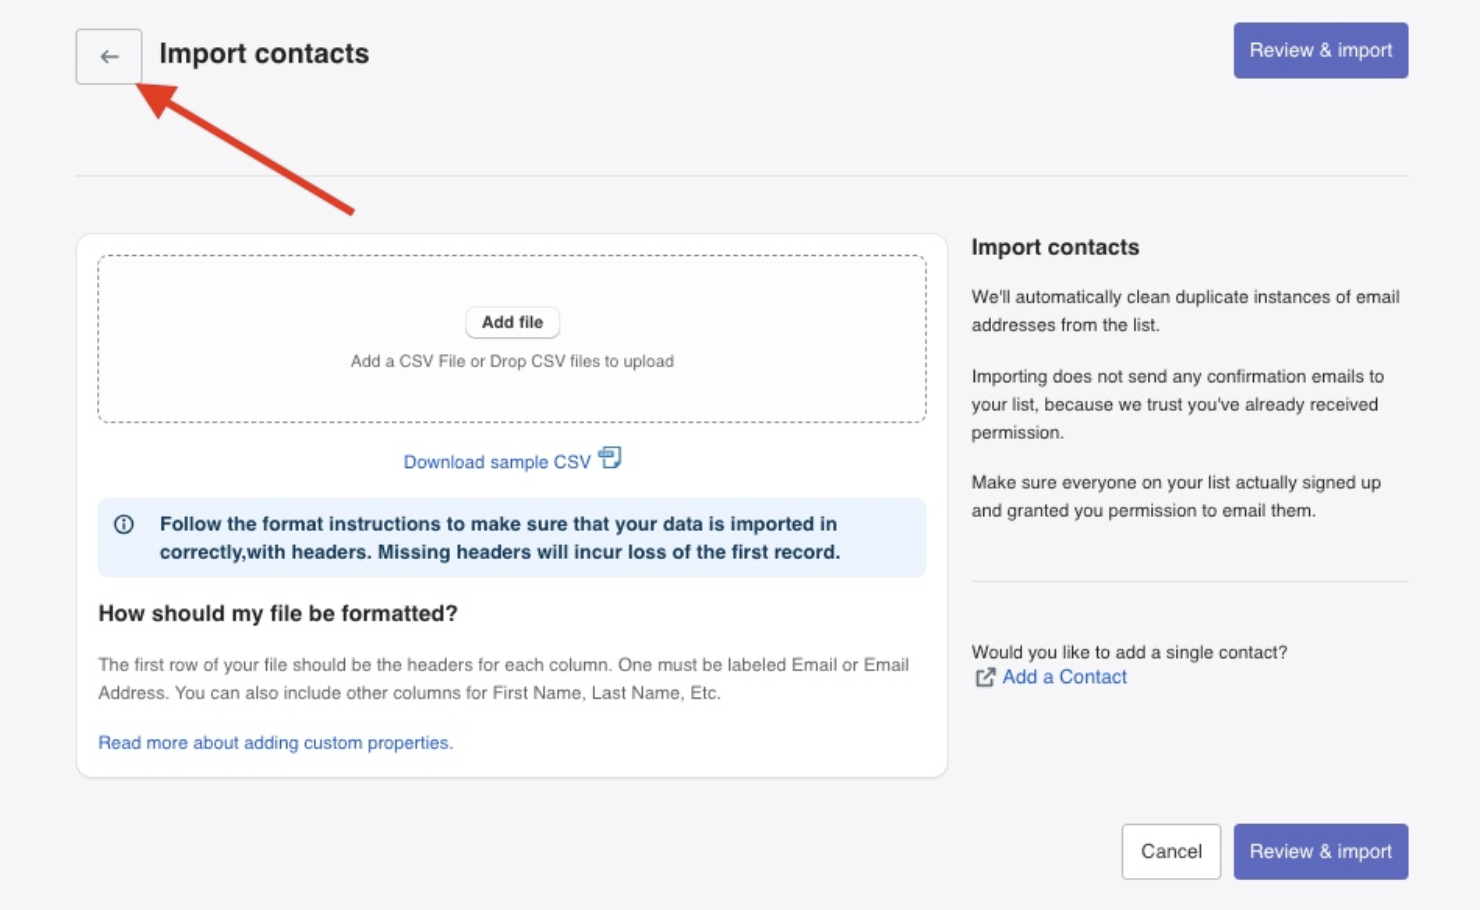
-
Go to this list’s Settings and copy the List ID, as shown below.

- Paste into the list_id field in Emotive.